How to use Groups and Campuses
Groups and Campuses have two major functions in HuddleUp:
- They provide an easy way to filter your team members by using the drop-down menu in your People and/or Reportstabs.
- They allow you to select a pre-made group of users to share content with.
Creating your Groups and Campuses
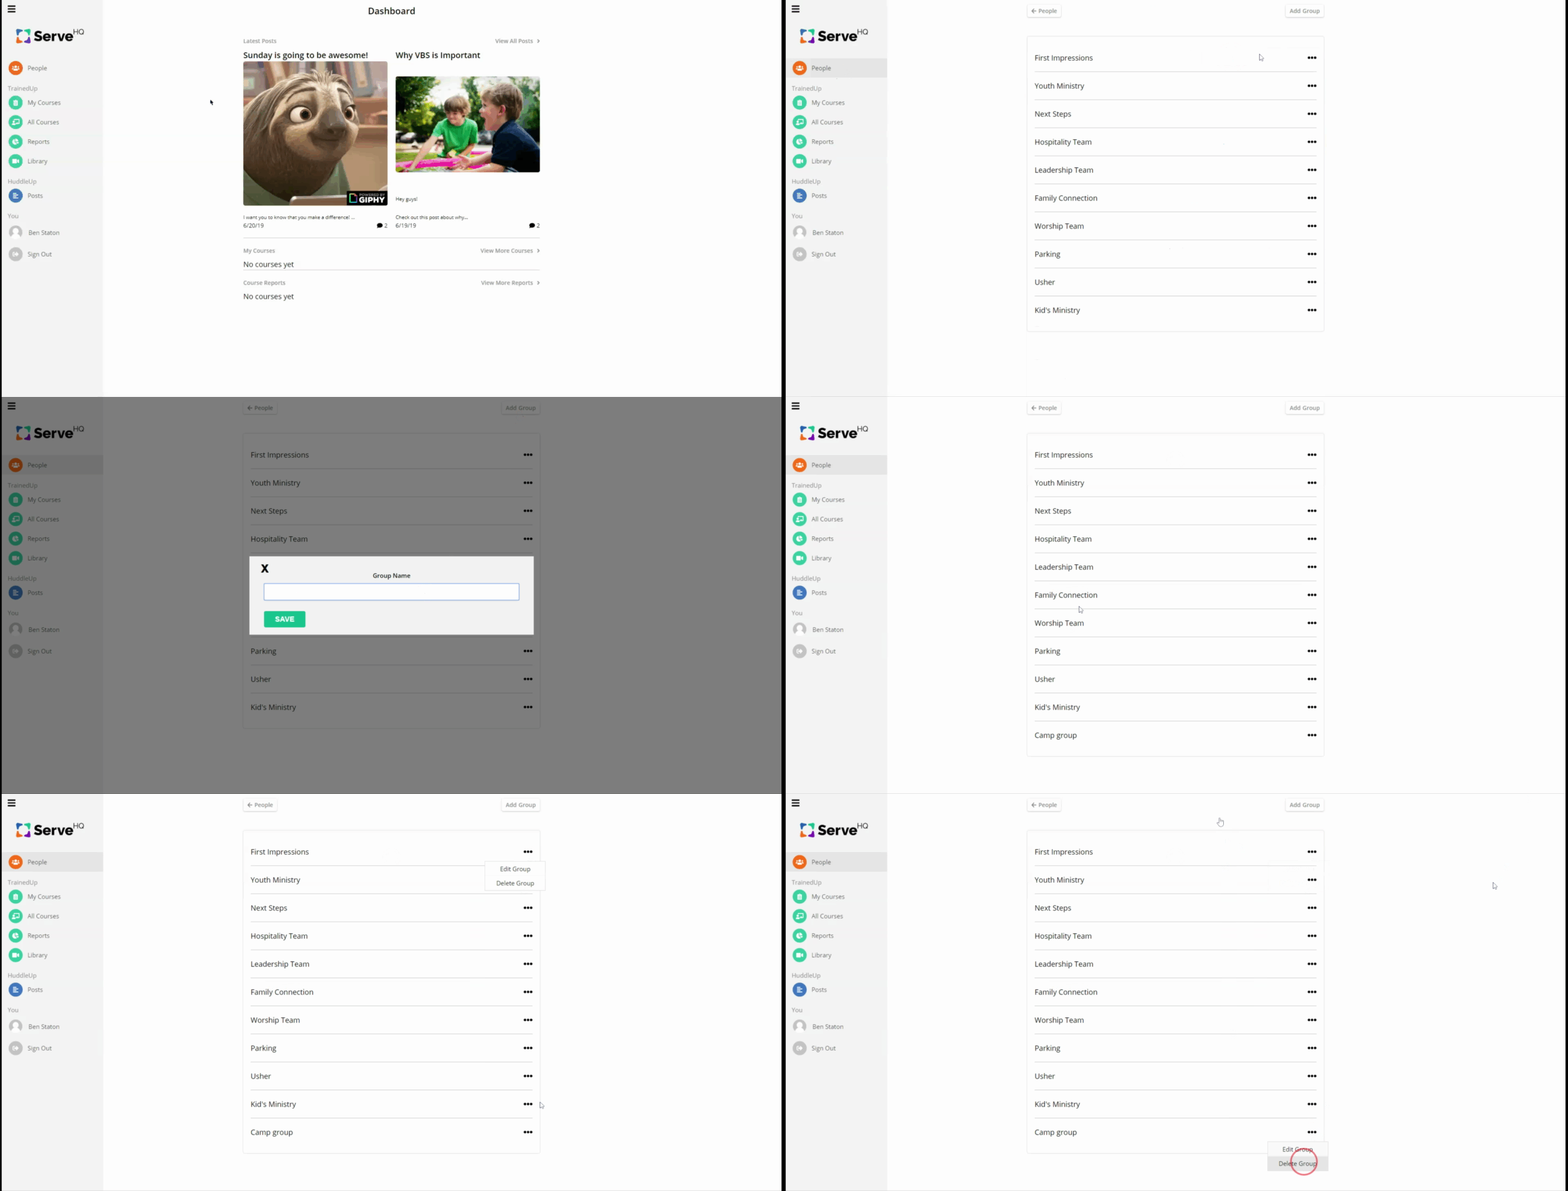
Groups allow you to sort people according to what ministry or team they serve in. These can also be things like Parents or Youth Kids. Groups can be any large or small number of people that you want to keep together in HuddleUp. The first step in sorting your people is to create some custom Groups for your account. To do this, follow the steps below:
- Click People located in the top the navigation bar to the left
- Click Edit Groups or Edit Campuses
- Click Add
- Type the name of the group or campus you wish to add
- Click Save

Adding your People to Groups or Campuses
There are two ways to add people to a group or campus.
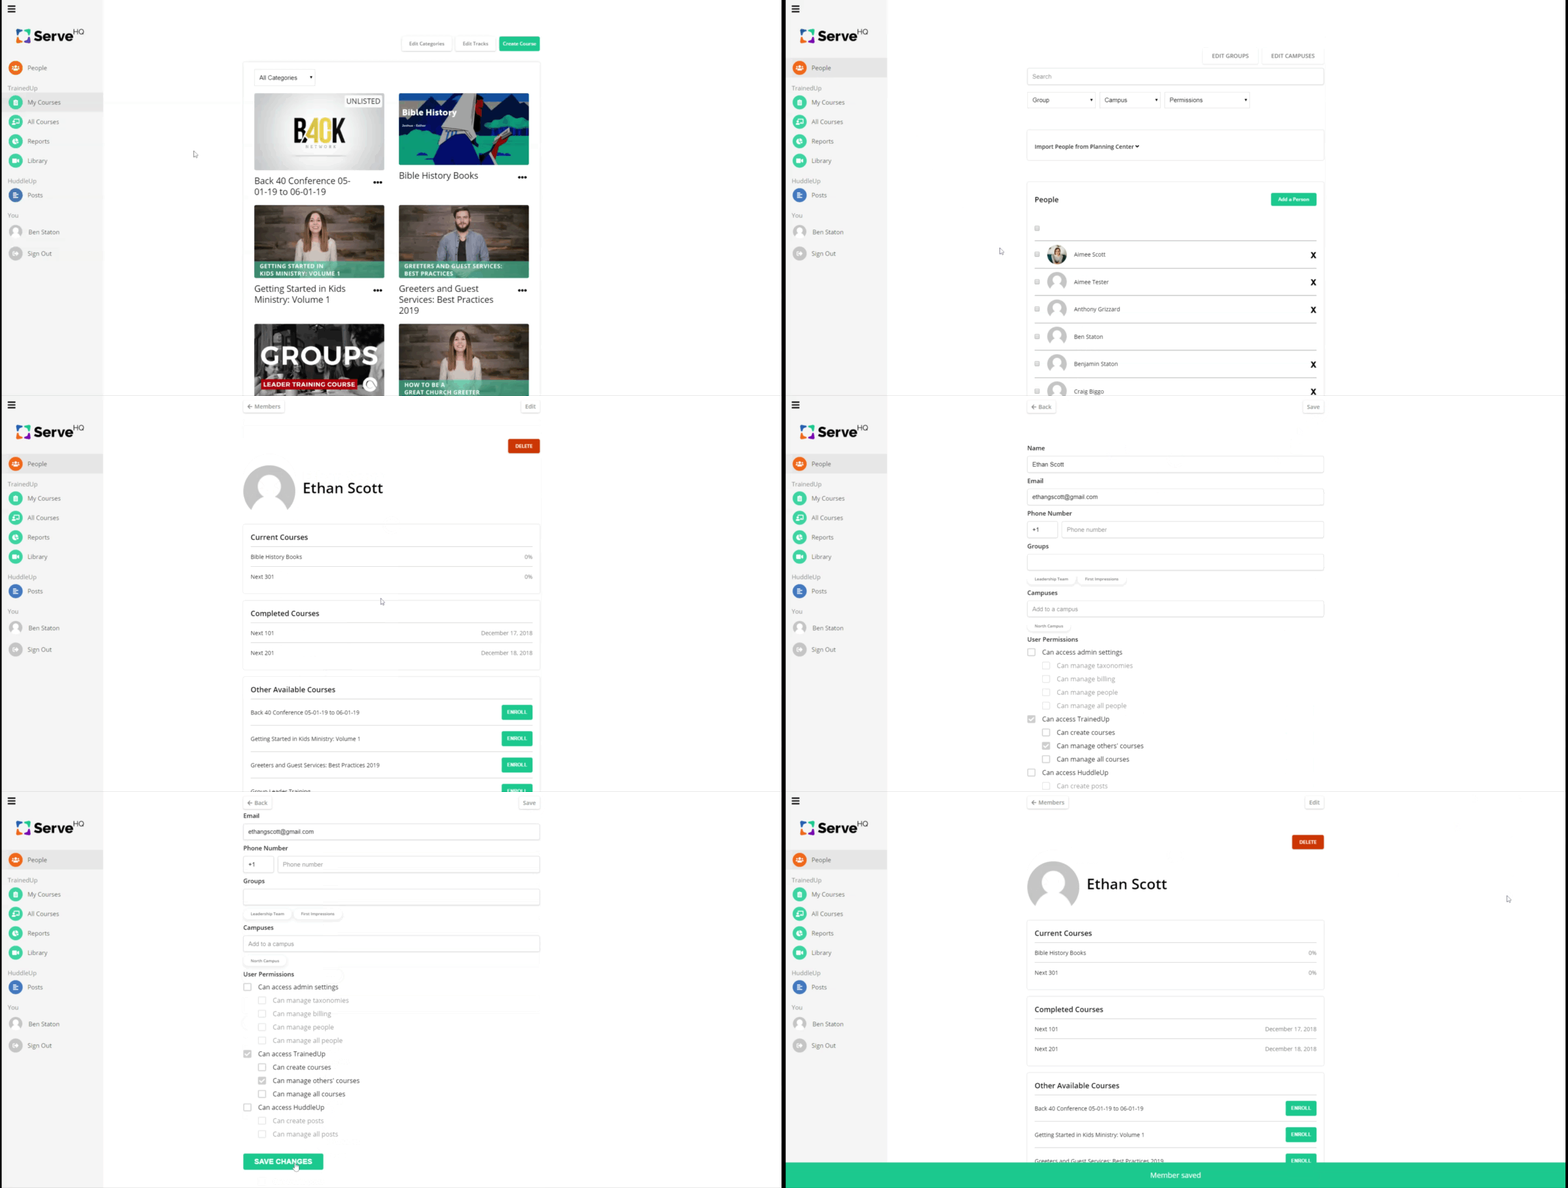
First, you can add individual people:
- Click the People tab.
- Scroll down and click on the person you’d like to add the Group or Campuses to
- Click Edit
- Type a Group or Campuses into the open field, and select it from the drop-down
- Click Save

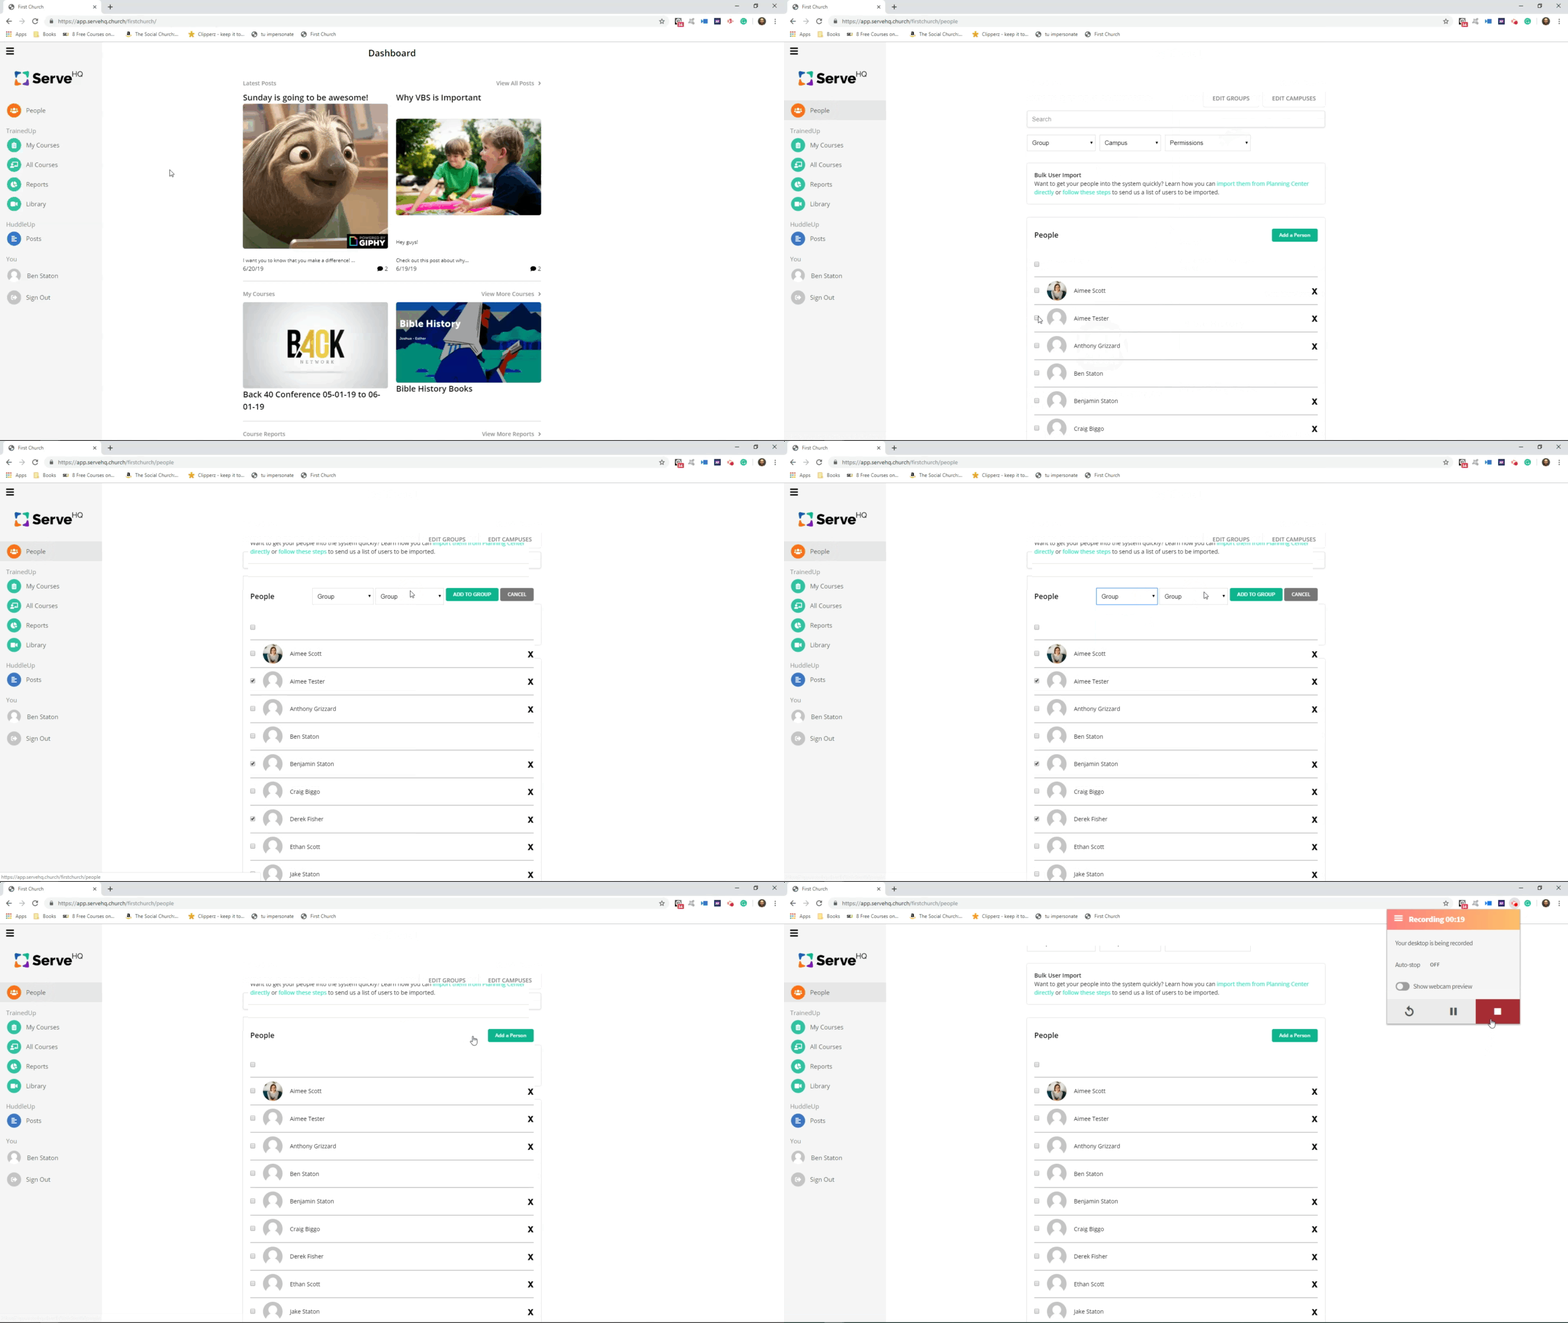
Second, you can add people to Groups or Campuses in bulk:
- Click the People tab.
- Click the check boxes next to every name you’d like to add or search a select to add multiple users.
- Click Add to Group
- Select the group type they need to be added to from the drop-down.
- Click the next box to add the group name.
- Click Add to Group.

