How to create a HuddleUp Post
Get started in HuddleUp by creating your first post!
To create a post in HuddleUp, follow these simple steps:
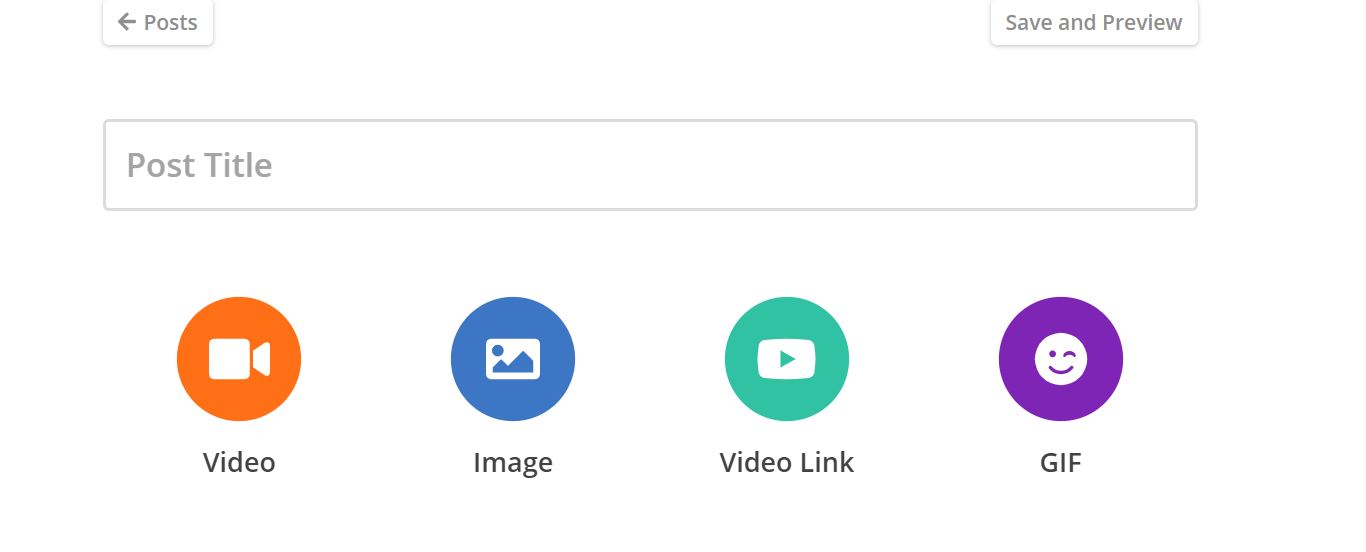
- Click on Posts in the side bar to the left of the screen.
- Click on the blue plus symbol in the top right corner of the screen.
- Add your post title.
- Choose the type of media you would like to add: Video, Image, Video Link, or GIF. (Clicking on each option, presents different types of media that can be attached to your post.)
- Use the notes section to communicate with your team, as well as add links to additional resources, podcasts, or websites.
When adding links to outside sources in the notes section, be sure to use the “http” version of the link. (Ex: https://servehq.church/)
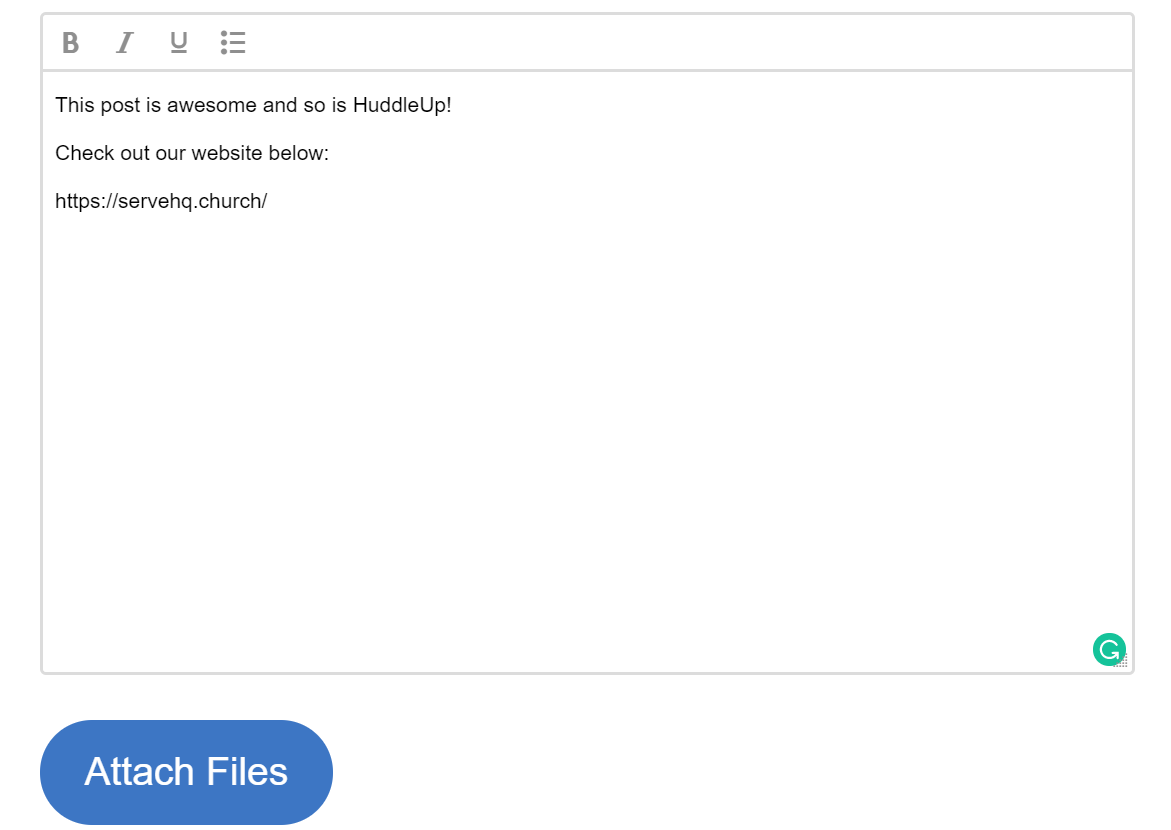
- Use the Attach Files button to add any desired files to your post such as background checks, handouts, power point presentations, maps, volunteer applications, audio clips etc.
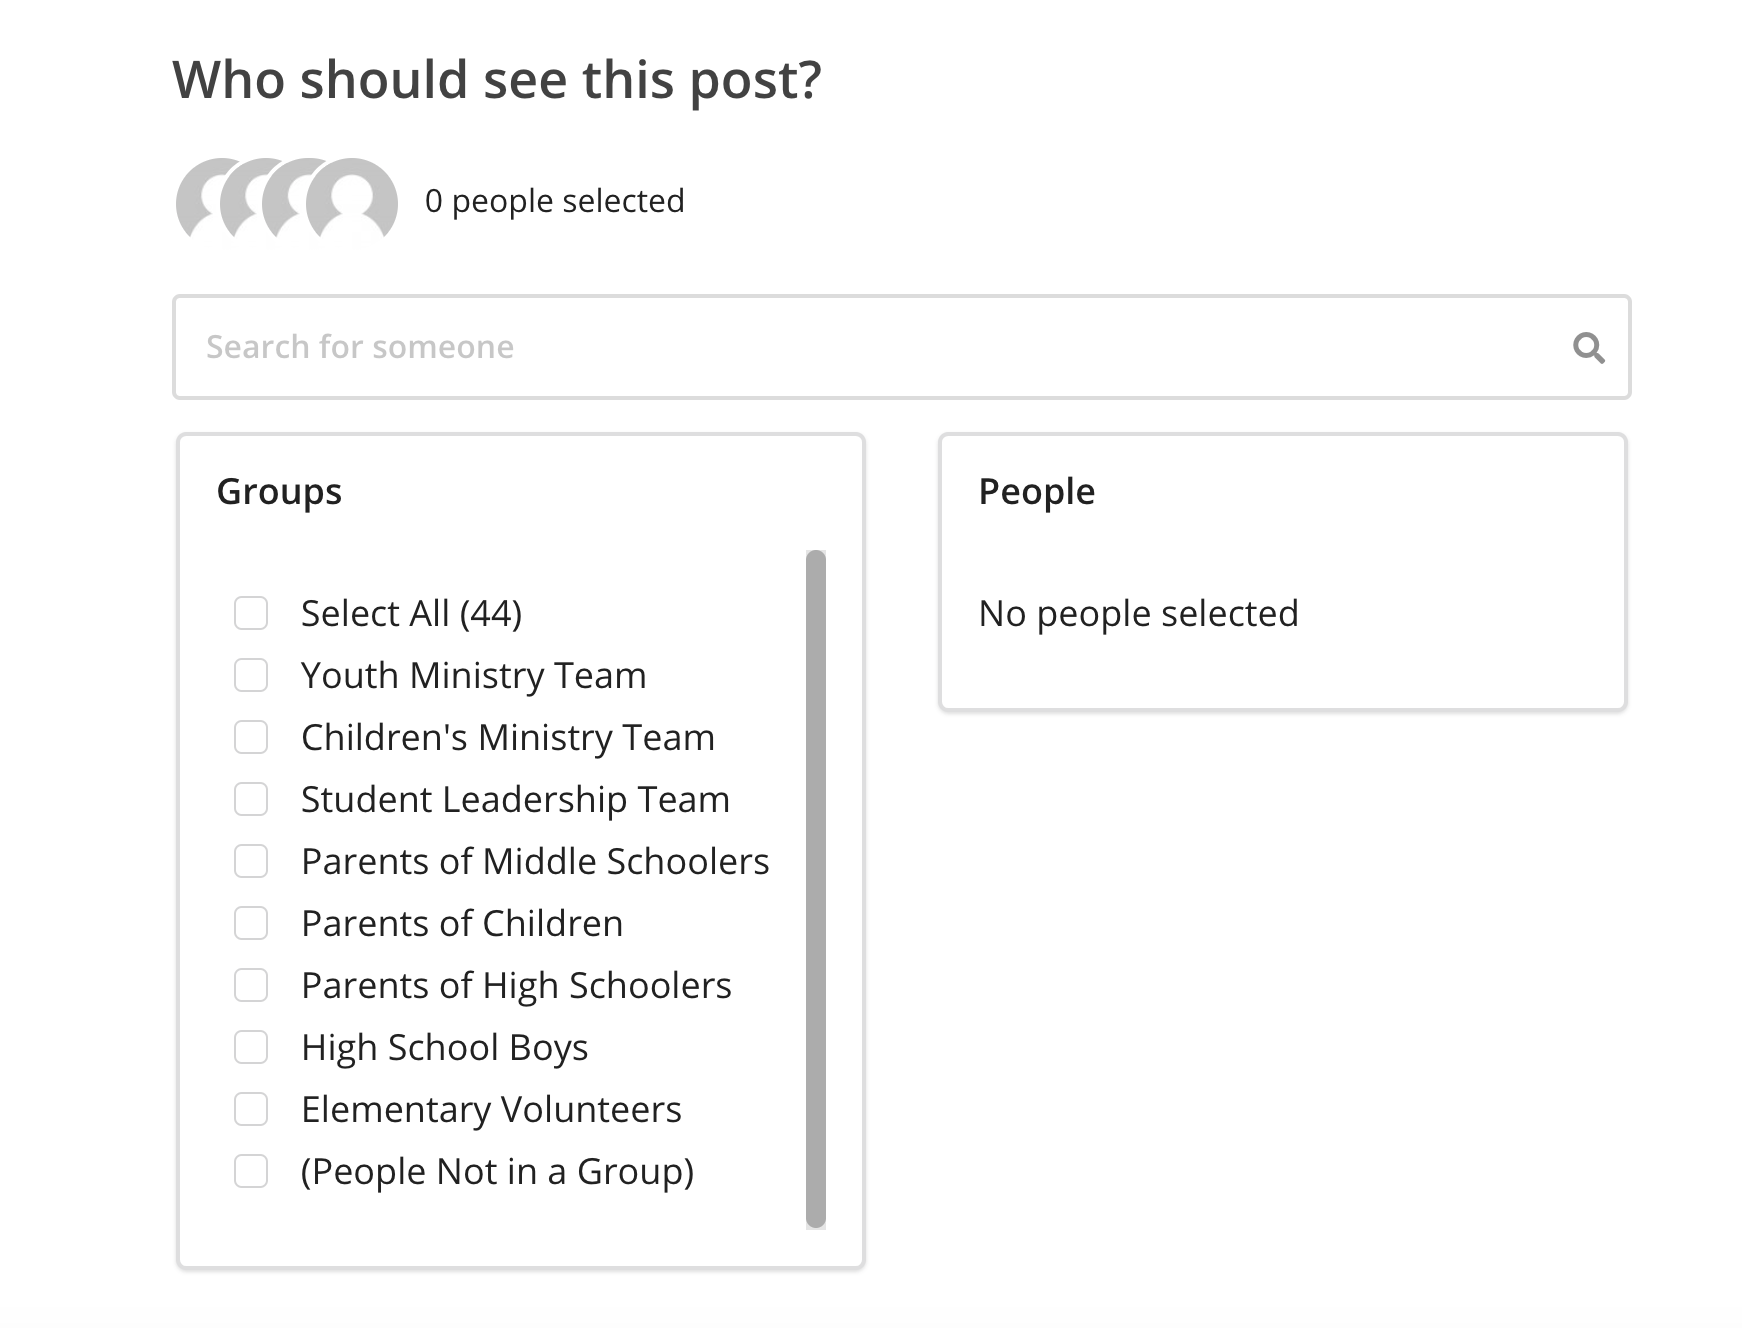
- Add people to your post by selecting the users that you would like to see your post. You can search for individual users or filter down by group(hyperlink) or campus(hyperlink). Don’t have any people to select?
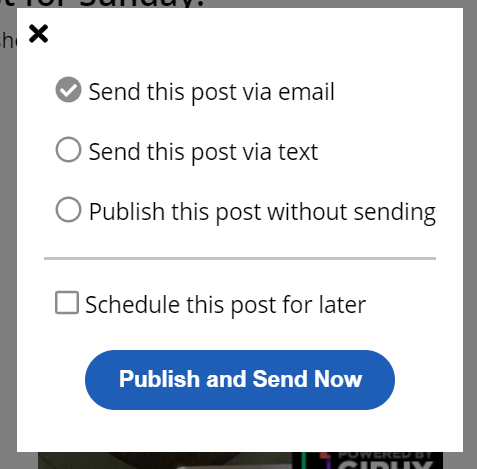
- Publish your post! Once you have completed your post, click the Save and Preview button found in the upper right hand corner of the page. You will then see a preview of your post. To publish your post, click the Publish Now or Schedule button.
- To send posts via email or text, just select the appropriate option and then click Publish and Send Now.
- The Publish this post without sending option will add your post directly to your page for your users to see.
- Selecting Schedule this post for later, will allow you to select a later time or date to send your post.
- Posts can also stay unpublished if you would like to return later for future editing!
Note: All emails that your users receive from our system will have your church name as the email’s “send name.” See example below:
